How to Build a 4’x8′ Raised Bed Garden
This was our first time building a garden ever. Unless you count a few potted plants on a 2’x4’ staircase landing in an alley. This is a scale we had never attempted, but thank goodness for the Internet and YouTube to guide us on this journey.

We have lived in our house for almost two years now and up until placing the garden in its new home, we spent a full year determining the best place for one. It is South facing and receives about 6-8 hours of sunlight, which is very important for a vegetable garden. It is also in a part of our yard that is near the faucet and a storm drain that we will eventually turn into a rain catch.
Basically we laid out an area where we envisioned a whole garden scene we could eventually expand on. It measured out to be 12’x20’ to give ourselves some working space and then we sketched it out. Determining how much room you want around the raised beds is key. Everything that we watched and read stated that common mistakes made while planning a garden is not leaving enough working space around them.
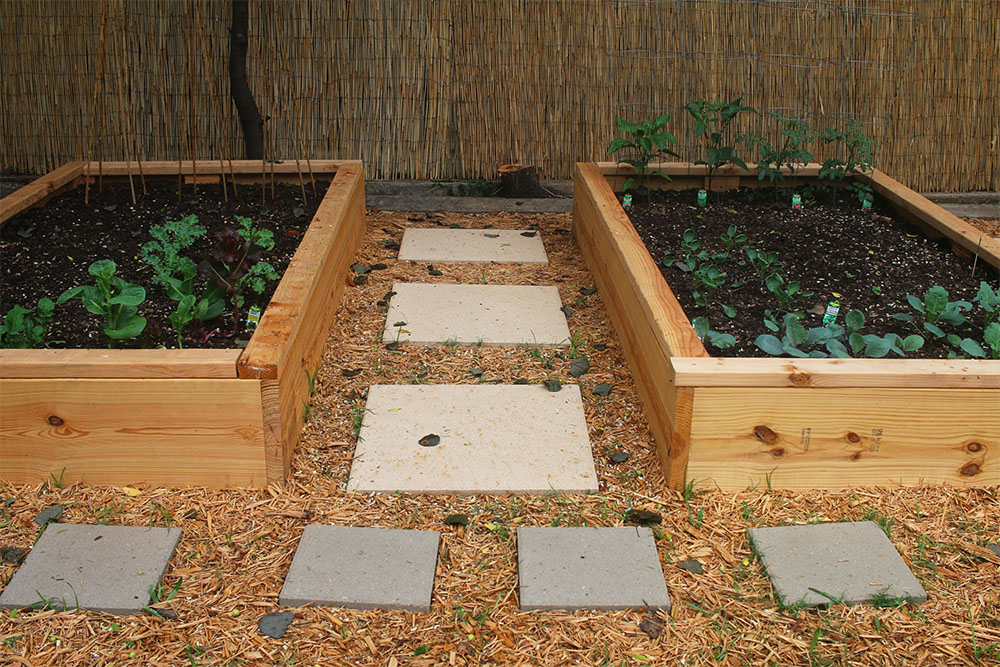
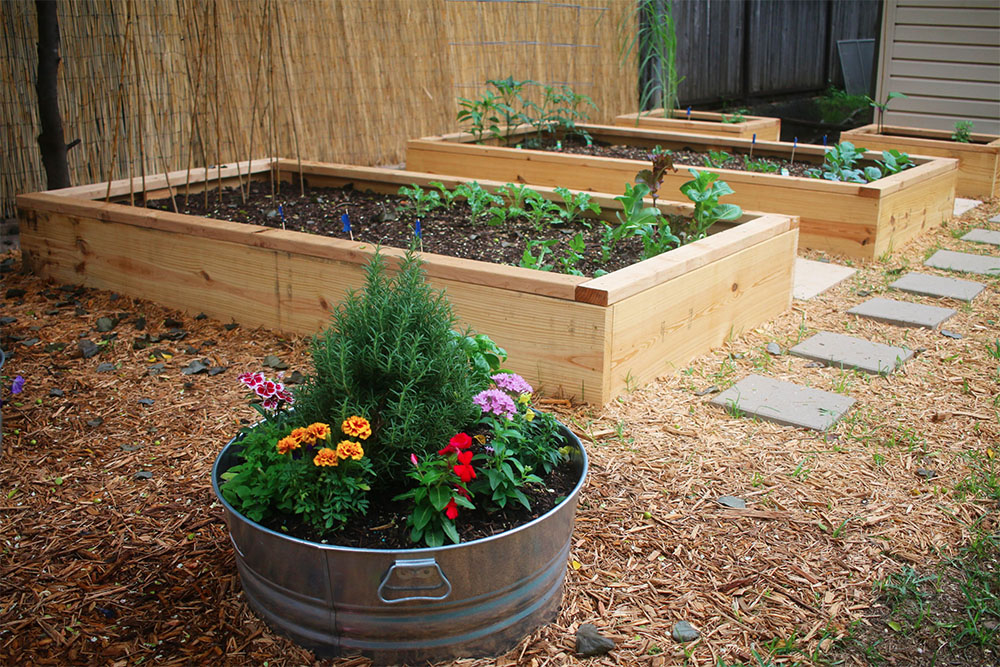
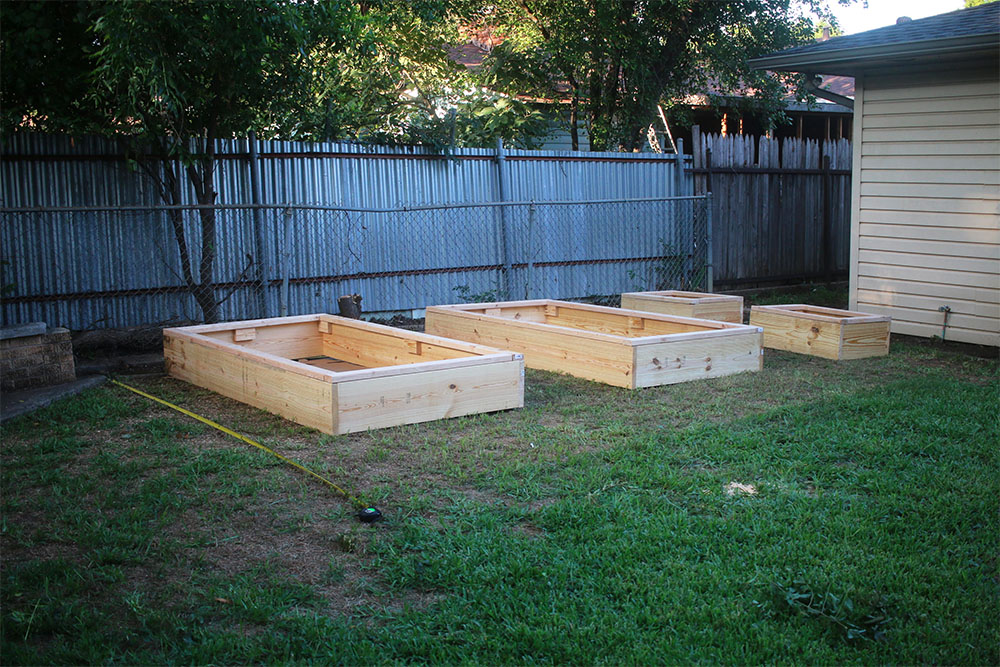
We decided to leave 3 feet in between each of the garden beds, which left us with enough room for two 4’x8’ beds and two 2’x3’. I would like to interject here and say that we had carefully planned how many boards we needed and calculated all of the measurements, but we still forgot one whole board and got some extra just in case after a couple of trips to the store. We went to the store seven times in two days and that is just part of the process. With that said, some of the instructions got lost in just getting these built, so the easiest thing for all of us is to share a single 4’x8’ bed. Then you can scale up from there.
Tools List:
- Porter Cable Circular Saw
- Impact Driver
- Speed Square
- Bubble Level Tool
Materials List:
- Plenty of cardboard boxes
- 3 (2”x10”) 8 FT Boards
- 4 (2”x4”) 8 FT Boards (they’re not actually 8 FT and you’ll see why below)
- Pack of Deckmate Screws
To Fill List:
- 9 Medium Sized Cardboard Boxes
- 2 Bags Cypress Blend Mulch (2 cubic feet bag)
- 4 Bags Top Soil (40 lb bag)
- 7 Bags Compost (40 lb bag)
- 8 Bags Miracle Gro Garden Soil (2 cubic feet bag)
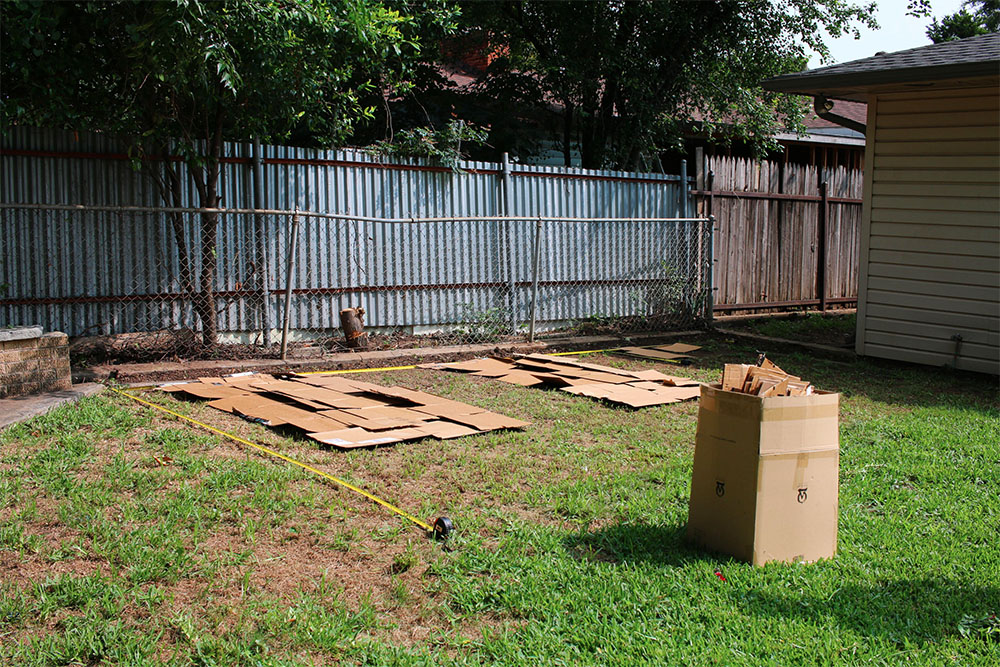
Laying out the cardboard (cardboard layer keeps grass and weeds from growing into your raised bed) first is an extra step, but a necessary step*. It gives you an idea of what your imagined in your head/sketched out garden will look like, and gives you a chance to double check your measurements. You can leave the cardboard there until you’re ready to place the bed down, but I say mark it well and pick up the cardboard to put back in afterwards.
*It was also a nice step to “scalp” the full garden area by putting the mower on the lowest setting so you can get rid of as much grass and/or weeds as possible.

To cut the boards, we just laid two other scrap boards down on the grass creating a makeshift sawhorse and it worked great. That paired with the speed square as a straight line guide to make and cut made the sawing process pretty seamless.
So 2 (2”x10”) 8 ft boards stay fully intact and the other is cut exactly in half. On both sides of the rectangle, the 4 ft boards are laid “inside” of the 8 ft boards. We initially tried pre drilling, but then decided it was easier not to. That is the beauty of the impact driver and we used deck screws for everything.
With the (2”x”4) boards, 2 will stay fully intact and the other 2 will be cut to 47 inches and 47 ½ inches respectively. I know that sounds weird, but we had skipped a step somewhere and that’s how we made it work. No harm no foul because the extra pieces leftover by cutting them that way can be the “cleats” that support the (2”x”4) boards creating a nice ledge you can actually sit on.
We did an offset “design” for the ledges, but basically just do it however you want and make sure you measure/lay it out a few times before making the cut. But, BEFORE you do that, go ahead and attach the cleats (you can see them in the picture below) inside the rectangle. We just put them in enough places for the ledge to attach and what seemed like adequate support to hold a person sitting on it. The plan we followed (but kind of fudged) can be found here: The Gardening Channel with James Prigioni.
After all wooden parts were attached, we carried it over and laid it (attempted to) on top of our cardboard which didn’t work at all, so that’s why I say just move the cardboard then put it in after. We had to make sure the beds were leveled (time to use the bubble level) and adjusted the dirt around it until they were. Or you can just use extra scraps of wood to shove in there because that was much easier for some of the beds.
Now, we thought the hard part was over here, but we were so wrong. Buying, hauling, and pouring bags of dirt is no walk in the park. Especially right after building 4 raised beds. Several people recommended getting bulk dirt delivered, but while that may be more convenient, you just never know the quality of the soil and I didn’t really want a pile of dirt sitting in my driveway or my yard. So it was absolutely worth it to haul bags and bags and bags of soil.
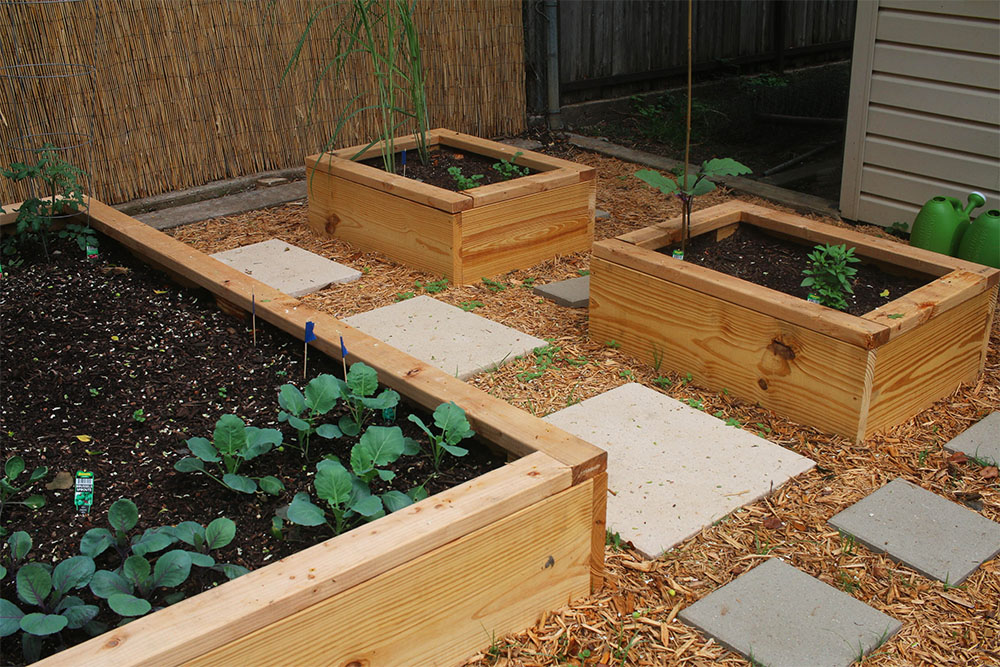
We laid down the mulch, then top soil, then compost and garden soil (mixed 1 bag compost to half a bag of soil directly in the bed and repeated the last layer until it was filled. We do not own a wheelbarrow, so it had to be done that way but the bed offers plenty of room to do so.
In hindsight, we should have gotten more mulch and top soil for the bottom layers, but now we have really healthy, high quality soiled garden beds. We planted a combination of starter plants and seeds. It took us two full weeks to completely fill it and so far everything has been doing great.